GoDaddy Conversations를 내 Gmail 계정에 연결
귀하의 Gmail 계정을 GoDaddy Conversations로 전달하여 모든 Gmail 메시지를 Conversations 통합받은 편지함으로 받으면 비즈니스 커뮤니케이션을보다 쉽게 관리 할 수 있습니다.
필수 : Gmail에 연결하려면 Conversations 계정 설정과 Gmail 설정에 모두 액세스 할 수 있어야하므로 시작하기 전에 기기에서 두 개의 브라우저 탭 사이를 편안하게 전환 할 수 있는지 확인하세요.
- 웹 브라우저에서 GoDaddy 제품 페이지 로 이동합니다.
독립형 버전의 Conversations를 사용하는 경우 Conversations 통합받은 편지함을 확장합니다. Conversations 플랜 오른쪽에서 웹받은 편지함을 선택합니다.
또는
Websites + Marketing 플랜이있는 경우 Websites + Marketing 로 스크롤하여 사이트 옆에있는 관리를 선택합니다. 왼쪽 메뉴에서 Conversations를 확장합니다.
- Settings(설정)를 선택합니다.
- Select Channels.
- Expand Email, and then select Connecct. (If you already have a connected Gmail address, select Add another.)
Note: If you have a Websites + Marketing plan and have enabled chat for your website, you’ll have a default email address to receive chat notifications. This is an internal email address created for you by GoDaddy. Connecting Gmail to Conversations will not affect this default email address.
- Gmail 을 선택하고 다음 을 선택합니다.
- 대화에 연결하려는 Gmail 주소를 입력하고 다음 을 선택합니다.
- 고객에게 이메일을 보낼 때 표시되는 이름을 입력하고 다음 을 선택합니다.
- Gmail 설정 열기 를 선택합니다.
- A new tab will open, showing your Gmail settings.
Warning: Make sure you keep both tabs open because you’ll need to switch between them to be guided through the steps.
- Go back to the Conversations tab and select Copy next to the forwarding address.
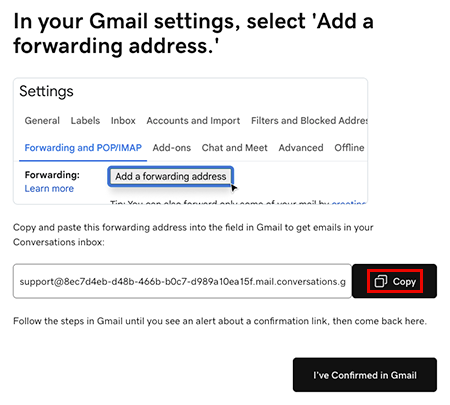
- Gmail 설정 탭으로 이동합니다. 전달 및 POP / IMAP에서 전달 주소 추가를 선택하고 텍스트 상자에 주소를 붙여 넣은 후 다음 을 선택합니다. 본인 확인이 필요할 수 있습니다. 이렇게하려면 화면의 지시를 따릅니다.
- 입력 한 이메일 주소로 확인 링크가 전송되었다는 메시지가 표시됩니다. 확인을 선택 합니다 .
- Back in the Conversations tab, select I’ve Confirmed in Gmail, and then select Confirm Forwarding in Gmail.
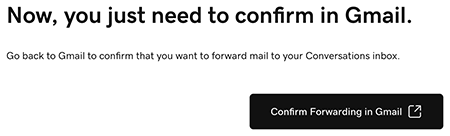
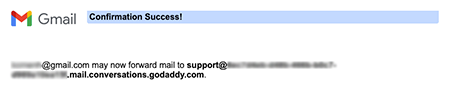
- A new tab will open, showing a Gmail confirmation. Select Confirm. When you see the Confirmation Success! message, you can close this tab.
- Go to the Gmail settings tab and reload the page.
Warning: If you don’t reload the page you might not see the option to select Forward a copy of incoming mail.
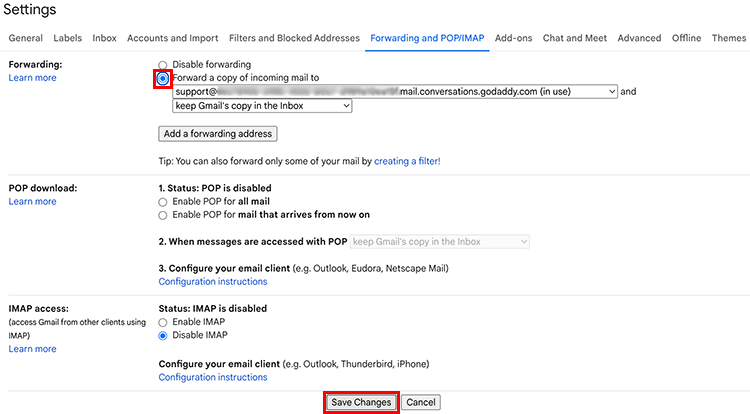
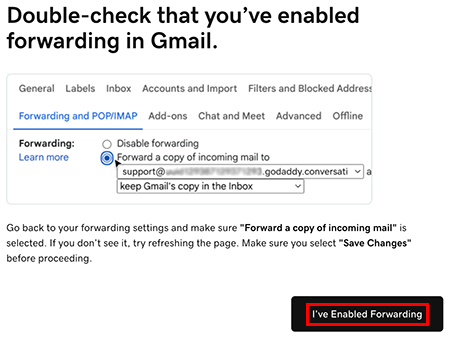
- Under Forwarding and POP/IMAP, make sure Forward a copy of incoming mail is selected. At the bottom of the page, select Save Changes.
- You’ll be taken to your Gmail inbox. At the top of the page you’ll find a message saying you’re now forwarding your email.

- In the Conversations tab, select I’ve Enabled Forwarding.
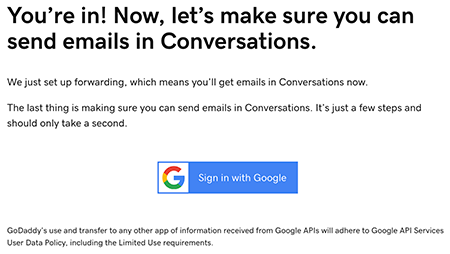
- A message will let you know you’ve successfully set up email forwarding. It could take up to 5 minutes for this message to show. Select Sign in with Google to start the process of making sure you can also reply to Gmail messages from Conversations.
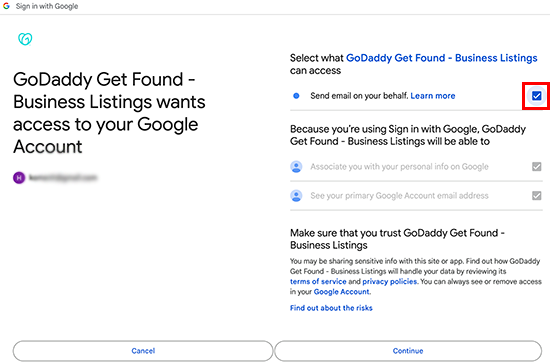
- Conversations에 연결 한 Gmail 계정에 로그인하고 계속을 선택합니다.
- Make sure Send email on your behalf is checked and select Continue.
- Conversations 최근 메시지에서 전달이 설정되었음을 확인하는 이메일을 찾을 수 있습니다.
참고 : Gmail 계정으로 보낸 메시지는 Gmail과 Conversations에서 모두 수신되지만, Gmail 계정에서 답장하는 경우 Conversations에 답장이 표시되지 않습니다. 이는 Gmail에서 전달이 작동하는 방식 때문입니다.
모두 설정되었습니다! 이제 Conversations 통합받은 편지함을 사용하여 Conversations에 연결된 다른 채널의 메시지와 함께 모든 Gmail 메시지를 관리 할 수 있습니다.